System Version
"20250123"
Status
good
Last Update
2025-02-12
RevyOS Meles Version Test Report
Test Environment
Operating System Information
- System Version: RevyOS Meles 20250123
- Download Link: https://mirror.iscas.ac.cn/revyos/extra/images/meles/20250123/
- iw-single-line binary: https://mirror.iscas.ac.cn/revyos/extra/images/meles/20240720/iw-single-line.bin
- Reference Installation Document: https://milkv.io/zh/docs/meles/getting-started/boot
Hardware Information
- Milk-V Meles 4GB/8GB/16GB
- eMMC module > 16GB
- A USB A to C cable
- Optional: A USB-TTL Debugger (Flash U-Boot with SPL to SPI NOR Flash)
- Optional: Keyboard, monitor, mouse (for graphical interface testing)
Installation Steps
Milk-V Meles’ Bootloader is stored inside the onboard SPI NOR Flash, which can be upgraded using cct tool provided by yoctools. This is different from Lichee Pi 4A which uses the same TH1520 SoC.
You’ll need UART serial connection to flash the firmware.
Note: please do not try to use
fastboot flash ubootmethod to upgrade U-Boot firmware, which is the same as the LPi4A. This method will NOT flash U-Boot to SPI NOR Flash which is loaded on boot by default. Thus you must usecctto flash the firmware.
Known issue: some AMD boards might not pick up Meles in fastboot mode.
Workaround: try connect Meles to a external USB Hub rather than the USB ports directly provided by the motherboard/PCH.
Use cct to flash Bootloader into SPI NOR Flash
cct is the image flashing tool provided by yoctools, which requires Python 3.6~3.11 and Linux.
If your distro has already upgrade to Python 3.12+, then you’ll need to manually install Python 3.11, create a Python virtual environment with it.
Since Python 3.12 and PEP 668, you can not use pip to install packages globally.
And yoctools still depends on some packages which were already deprecated/replaced in Python 3.12+, thus you must create a Python venv in order to use yoctools.
Take Arch Linux as an example. By the time this article was written (2025.01), the default Python is Python 3.13, directly install yoctools will not work. You should install Python 3.11 from AUR and creating a virtual environment using this version in order to flash the firmware.
Prepare Python 3.11 environment:
paru python311
sudo pacman -S python-virtualenv
virtualenv -p 3.11 meles
source meles/bin/activate
pip install yoctools
cd meles/bin
For those distros still staying at Python 3.6~3.11, you can install yoctools directly with pip. Python venv is not required.
Download the firmware:
wget https://mirror.iscas.ac.cn/revyos/extra/images/meles/20240720/iw-single-line.bin
wget https://mirror.iscas.ac.cn/revyos/extra/images/meles/20250123/u-boot-with-spl-meles.bin
Note: choose the correct version depending on your board’s RAM:
- 4GB -> u-boot-with-spl-meles-4g.bin
- 8GB -> u-boot-with-spl-meles.bin
- 16GB -> u-boot-with-spl-meles-16g.bin
For iw-single-line.bin, you can use it with all RAM versions.
Connect the board and your PC with UART debugger. DO NOT run tools like minicom or tio which will occupy the serial port.
Hold the recovery button and THEN power on the board.
The recovery button is located at the edge of the board near the GPIO pins, on the inner side it’s the eMMC boot button. Don’t mixed them. For details please refer to: https://milkv.io/docs/meles/hardware/meles-main-board
sudo ./cct list -u /dev/ttyUSB0
#Please change accordingly. Depending on your debugger, e.g. for CH343P it's ttyACM0 rather than ttyUSB0
sudo ./cct download -d ram0 -f iw-single-line.bin -v checksum -r
sudo ./cct download -u /dev/ttyUSB0 -d qspi0 -f ./u-boot-with-spl-meles.bin -v checksum -r -t 1200
Wait for the flashing progress to complete, then power off the board, hold the recovery button and reconnect it to PC.
Flashing Image using fastboot onto the Development Board
Check connection status:
$ lsusb | grep T-HEAD
Bus 001 Device 045: ID 2345:7654 T-HEAD USB download gadget
Next, execute the following commands to download, extract and flash the images to your board’s eMMC.
If
fastbootdoesn’t pick up the board or you encounter flashing issues, check the device connection and try runningfastbootas a privileged user (i.e.sudo). Doing so is usually required under Linux since the default USB VID/PID is not in the default udev rules.
wget https://mirror.iscas.ac.cn/revyos/extra/images/meles/20250123/boot-meles-20250123_071145.ext4.zst
wget https://mirror.iscas.ac.cn/revyos/extra/images/meles/20250123/root-meles-20250123_071145.ext4.zst
zstd -T0 -dv *.ext4.zst
sudo fastboot flash ram u-boot-with-spl-meles.bin
sudo fastboot reboot
sudo fastboot flash boot boot-meles-20250123_071145.ext4
sudo fastboot flash root root-meles-20250123_071145.ext4
After the flashing process, reset the board and you’re good to go.
It is recommended to do a system upgrade via sudo apt update; sudo apt upgrade after booting into the system.
Logging into the System
Logging into the system via serial port or graphical interface.
Default Username: debian
Default Password: debian
Expected Results
The system should boot up normally and allow login through the serial port.
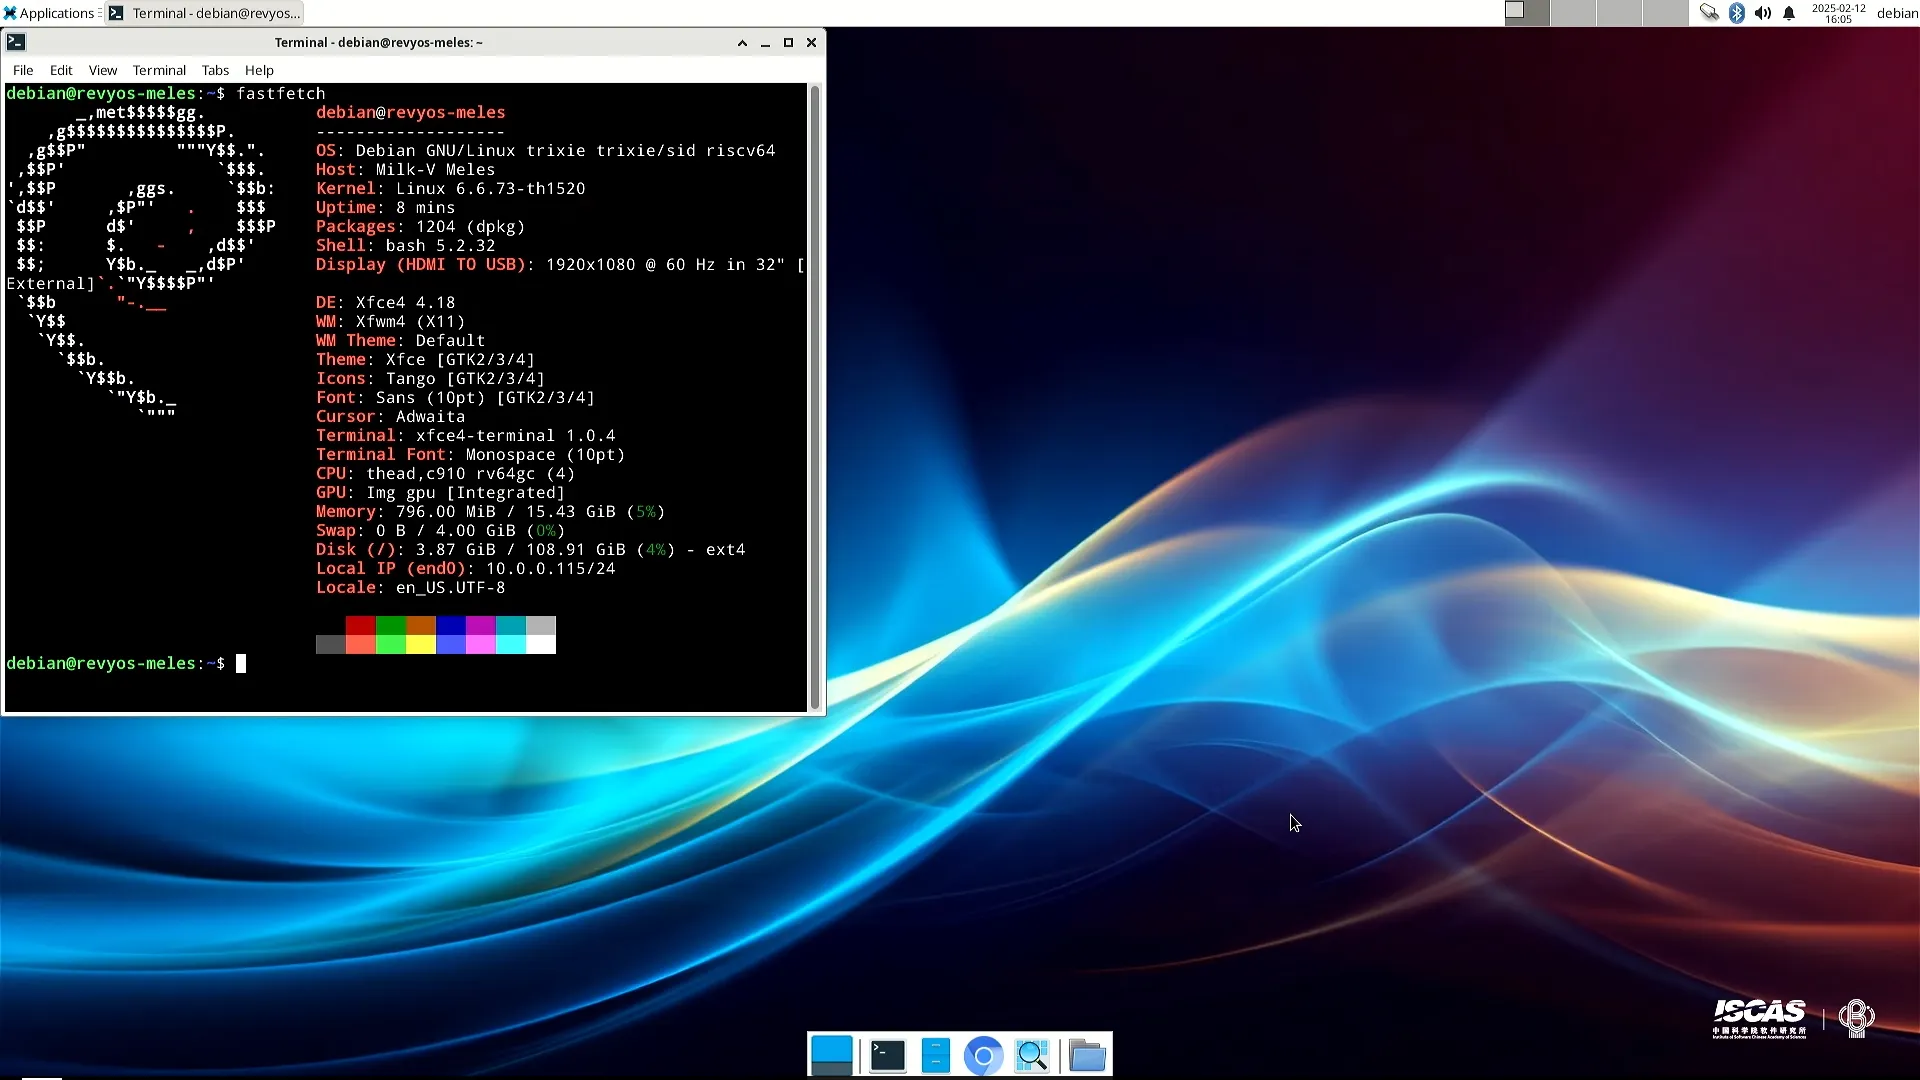
HDMI output works and the user can login to the desktop environment.
Actual Results
The actual results matches the expected results.
Boot Log


(The screenshots are from an HDMI capture card.)
Test Criteria
Successful: The actual result matches the expected result.
Failed: The actual result does not match the expected result.
Test Conclusion
Test successful.
Source: Support Matrix